by Alan Thomas, marketing, ZwickRoell UK
Compared with conventional materials, advanced composite materials can deliver benefits such as enhanced strength-to-weight ratio and improved durability of components. However, before these materials are introduced into the manufacturing process they need to be thoroughly tested and their performance validated.
Full characterization of the properties of composite materials for use in demanding applications requires a range of mechanical tests to be conducted. Determination of mechanical properties requires tensile, compressive and shear tests.
In qualification and materials development, other tests are used to determine more complex properties, such as open-hole tension/compression, inter-laminar fracture toughness, compression after impact and fatigue. Tests need to be conducted over a range of temperatures on samples that may have been conditioned in a variety of environmental conditions such as high humidity or immersion in fluids.
Testing composites for aerospace applications presents one of the most demanding areas of testing. Laboratories undertaking composites testing for aerospace applications face significant challenges which include: ensuring that tests are conducted in compliance with the wide range of standards; being able to demonstrate accurate alignment of grips and fixtures and the ability to change test fixtures efficiently to cover a wide range of tests, and ensuring the correct test environment.
Composite testing standards
Composite test procedures have been standardized by various organizations. The main international composite testing standards are those published by ASTM, ISO, and CEN.
In addition to the internationally recognized standards, there are manufacturers’ ‘in-house’ standards in common use including those from Airbus and Boeing. In many cases, the test methods described by different standards are fundamentally the same, but there are some significant differences in the specimen and fixture dimensions.
In addition, auditing bodies such as Nadcap further define performance criteria, for example, alignment for the testing equipment.
Common composite testing methods
In-plane tensile testing of plain composite laminates is probably the most common test, but tensile tests are also performed on resin-impregnated bundles of fibers, through-thickness specimens and sections of sandwich core materials.
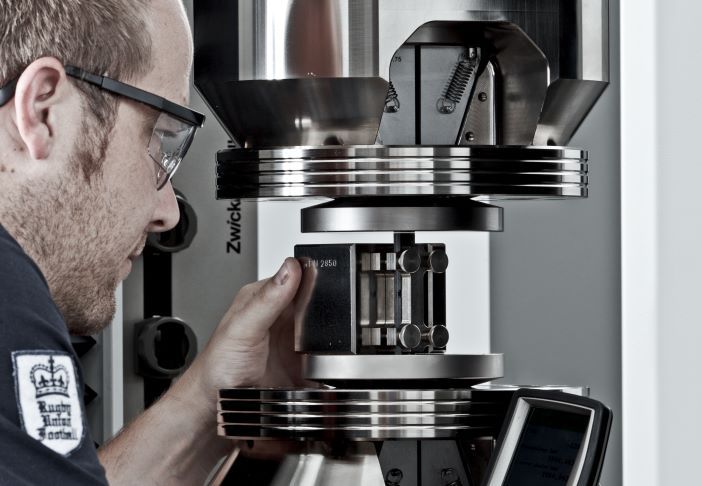
Tensile test specimens are parallel-sided with bonded tabs to prevent the grip jaws from damaging the material and causing premature failure. Gripping arrangements include manual and hydraulic wedge grips and for demanding aerospace testing, hydraulic wedge grip solutions are generally preferred because of their controllability and repeatability.
However, well-designed mechanical wedge grips can also provide good levels of alignment. Hydraulic gripping arrangements for non-ambient testing often locate the hydraulic components outside the temperature chamber for safety and reliability.
Testing setup
Accurate alignment of the grips and specimen is extremely important when testing composite materials since the anisotropic properties, such as the modulus and strength of the material differ depending on the direction of the applied stress and are often brittle in nature. Adjustable alignment fixtures ensure that testing systems meet the alignment criteria required for reliable composites testing and as required by specific audit programs recognized by aerospace industries, such as Nadcap.
Alignment fixtures need to allow adjustment of both concentricity and angularity while the machine load string is under load. The widely accepted method of checking for alignment under load is to use a strain-gauged alignment specimen. The alignment specimen should have dimensions that are as close to the specimens being tested as possible and the alignment specimen will be fitted with groups of strain gauges.
Purpose-designed software is available to provide a display of both the bending, concentricity and angularity errors. The software identifies the adjustments that are required and displays the effect of the adjustments, enabling quick and accurate test machine setup.
When utilizing aligned testing machine grips, it is recommended that they are permanently left in place and that, if necessary test fixtures including compression platens and bend fixtures are mounted on the grips using special adapters.
Measurement and compression for composite testing
Strain measurement for composite tensile testing is usually performed using either an extensometer or a bonded strain gauge. Generally, the use of an extensometer is preferred as attaching strain gauges involves additional labor, time, and expense. In both situations, the recommendation is to use an average strain value based on measurements on both sides of the test sample to correct for errors caused by any specimen bending.
Composite compression test methods need to provide a means of applying a compressive force into the material while importantly preventing it from buckling. Most composite materials are produced in the form of laminate panels and therefore the material being tested will be in the form of a relatively thin and flat rectangular test specimen.
There are several methods of introducing a compressive load into a test specimen which include end loading, where the load is introduced onto the end of the test specimen; shear loading, where the load is introduced into the wide faces of the test specimen and combined loading, which comprises a combination of shear and end loading. Two methods for preventing buckling of a test specimen are typically, the use of a test specimen with a short, unsupported gauge length and the use of lateral support along the length of the specimen.
All compression fixtures are required to have good axial alignment and a high lateral stiffness to provide and maintain accurate alignment under the lateral loads that can be generated by a compression test. Bending will have a significant effect on test results and most of the compression test methods include a value for the maximum allowed test specimen bending.
Damage tolerance is a major concern with composite laminates. Compression after impact testing provides a measure of damage tolerance and the test is usually performed on a rectangular laminate panel. The test consists of two separate parts; initially, the panel is clamped around the periphery and then subjected to a controlled impact in the center of the panel using a drop weight test machine.
The impacted panel is then located in a special jig and subjected to an edgewise compressive load until it fails, and the failure load gives an indication of the residual strength of the panel after the impact damage.
Controlling temperature in composite tests
Typically, the most common test environment for composite materials is temperature which generally ranges between -80°C and 250°C. Frequently test specimens are pre-conditioned in different environments prior to testing. Pre-conditioning is often in humid conditions but exposure to fluids is also used.
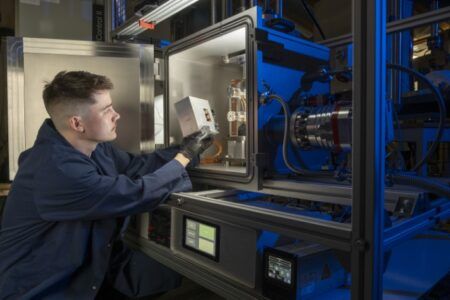
Testing which includes tensile testing of pre-conditioned composite materials can generally be conducted in a temperature only controlled environment. Environmental chambers designed for testing at low and high temperatures are generally equipped with forced convection for heating and a liquid nitrogen injection system for cooling purposes.
The mechanical testing of composite materials is a complex topic, involving a range of test configurations, a wide selection of internationally recognized testing standards, and frequently the need to test in a variety of different environments. The availability of well-aligned test machines and gripping arrangements, advanced technology extensometers, interchangeable test fixtures and intuitive testing software, facilitates the mechanical testing requirements demanded by R&D, and routine quality assurance.


