by Abigail Williams
The collection and interpretation of high quality, accurate and reliable data is a fundamentally important element of the aerospace testing and certification process. The pursuit of constant improvements in data acquisition methods and technologies used by engineers in ground and flight testing continues to be a key focus for both equipment suppliers and OEMs.
Engineers adopt different approaches to ensure data quality in aerospace testing. They employ best practice techniques to data acquisition and management to keep data accurate and results reliable. Environmental factors such as temperature, pressure and vibration can impact data quality and must be dealt with. Meanwhile data must also now be suitable for use by innovative technologies like machine learning and AI during data analysis.
Defining parameters
According to Sridhar Kanamaluru, chief architect at Curtiss-Wright Defense Solutions, the quality of test data is of paramount importance when establishing platform performance, such as airframe structural loads and vibration and engine performance over the entire flight envelope.
Test data also sheds important light on the safety aspects of the aircraft with respect to failure mechanisms and the conditions where failures are likely to occur.
“High quality data, in terms of measurement accuracy and repeatability, when correlated with phenomena across the entire test platform and the specific test conditions, helps aircraft manufacturers design and improve airframes,” says Kanamaluru.
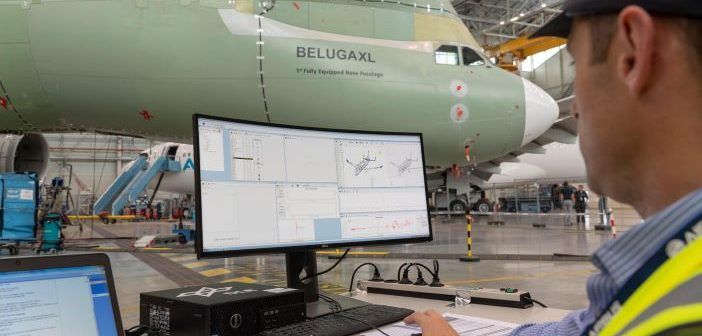
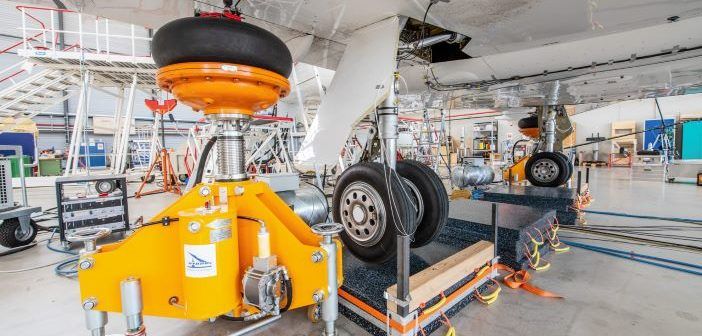
use of complex data
acquisition systems
(Image: Airbus)
Elsewhere, Sandro Di Natale, product manager of test and measurement solutions at HBK points out that data quality “is the most important currency when validating an aircraft or spacecraft’s compliance against expected key performance parameters”.
He cites two examples focused on structural integrity, but which can be expanded to other testing domains. The first is where test data is used to verify simulation models and enable virtual testing, and consequently to adapt the original design. Here, Di Natale observes that poor test data “may lead to wrong assumptions or even over-engineering the structure, for example making it too heavy and less efficient”.
The second example is where test data is used for aircraft certification to prove airworthiness. “Poor test data might overestimate the aircraft structure’s capability to withstand expected loads and lead to severe trouble during operation,” he says.
Best practice for data acquisition
According to Kanamaluru, best practices for aerospace testing data acquisition include the selection of transducers – or sensors – of sufficient sensitivity, dynamic range, frequency and time response and accuracy over a wide temperature range for the test parameters. As an example, to measure high frequency phenomenon, for example vibration, he notes that the sensor “must have the appropriate frequency response so that all relevant harmonic performance can be captured”. This concept also extends to data acquisition devices that convert the sensor measurands to a form suitable for telemetry and/or recordings.
He says, “The data acquisition devices should provide adequate gain, linearity, and filter performance across a wide temperature range to accurately represent the measurand in the final transmitted form, whether as a real-time telemetry signal or as data stored on a recorder for post-test analysis.
“Calibration of the sensors and data acquisition devices over a wide temperature range, using reference standards is mandatory for achieving the required data quality and accuracies. The data acquisition devices should also be tested for vibration, to ensure they are immune to microphonics and will perform well under the test conditions.”
Meanwhile, Christof Salcher, product manager at HBK notes that when it comes to developing best practice, aerospace testing’s main challenge is that is usually only a single prototype available for testing. In recognition of this, the reliability of the overall measurement chain is of utmost importance and extends to the availability of data.
“Tests cannot be simply repeated – meaning that any measurement or test data needs to be fully traceable to national standards and include consideration of levels of uncertainty,” Salcher says.
“The knowledge that one Newton is one Newton, or one Volt is one Volt ensures the right insights from the data, while the assessment of uncertainty ensures that all engineers are aware of the limits of the acquired data.
“My advice is to look for a competent partner who can cover the whole chain from the sensor to the result and have the highest level of data quality at each step.”
The enemies of data quality
When trying to mitigate potential issues that could harm data quality engineers need to be cognizant during installation of the factors that affect the signal quality, such as local ground loops or noise in the power supply system. Kanamaluru says, “You need to be aware of the types of losses and interference that will be picked up in the wiring between the transducer and the data acquisition devices,” he adds.
“Appropriate shielding of the differential circuit twisted-pair wiring must be balanced with the overall weight and costs of the test instrumentation system. In many cases, when allowed by space constraints at the measurement location, it may be appropriate to convert the measured transducer signal to a form that is immune to the environment – for example, the data acquisition devices convert the measured signal to Ethernet packets for transmission over a network.
“In this instance, the short wiring lengths between the sensor and data acquisition device reduce the losses and noise, while the Ethernet packets are transmitted more securely over the longer lengths.”
According to Jon Aldred, director of product management at HBK variables such as temperature, pressure, and vibration are some of the biggest “enemies” of high data quality. Sensors and electronics, especially analog components are subject to influence by such environmental factors and he advises that the best approach is to avoid these harmful influences on measurement data. “If this is not possible, compensation can be considered,” says Aldred.
“One example in structural testing is strain measurement under varying temperatures. You can use active compensation of the wire resistance instead of just shunting once at the start of the test. You can also choose the strain gauge with the right compensation behavior matching the material under test, and you can record the temperature and account for the influence by correcting the acquired data with this information,” he says.
“There are multiple ways to improve data quality already in the limited field of strain measurement and changing temperature. This could be easily expanded to other physical quantities which need to be measured, as well as other types of influence on data quality like electromagnetic interference.”
Evolving technology standards
Sensors and measurement devices have a longer term role in ensuring data quality by improving over time to meet the demands of modern aerospace testing and standards. Kanamaluru believes that technology improvements in sensor and data acquisition devices are most likely to occur in terms of alternative power sources like Power-over-Ethernet (PoE) and wireless technologies such as IEEE Standard 1451 for distributed instrumentation systems with a centralized recorder and telemetry.
Di Natale highlights several important aspects in the area of validation and verification, including the crucial aspect of traceability, as well as the use of full documentation and meta data. In his view, it is not sufficient to only capture results, there needs to also be a strong focus on how these results were obtained. “An example helps us to understand better,” he says. “Let’s assume that during data analysis the data from a certain sensor is far away from the expected range. In this case it is of utmost importance that the sensor installation is fully documented – potentially a visual inspection will show insufficient sensor application.
“On the other hand, the data might be processed to calculate electric power from measured voltages and currents. A look at the raw sensor data might bring to light a mistake in getting from sensor signal to computed data used for analysis,” he adds.
Exponential growth of data
Moving forward, Kanamaluru points out that the amount of data is growing exponentially. “There is an increased number of measurands, sampling rates and longer test durations. This will be paralleled by increased recording rates and storage capacities of the solid-state-media used in on-board recorders,” he says.
These industry developments are leading to what he terms “a glut of data” that cannot be processed entirely by humans without impacting program schedules. To address this challenge, machine learning (ML) and artificial intelligence (AI) technologies can be deployed to process the data more quickly and to identify anomalies in the data, whether in the data collection process or the performance of the platform.
In Kanamaluru’s view these techniques are especially useful for identifying anomalies that occur very rarely and those that occur on specific platforms but are not present across the entire fleet. These anomalies can be caused by the instrumentation system. For example, through installation or specific transducer and data acquisition device errors, or as the result of airframe malfunction. In either event, ML and AI techniques can help identify and resolve issues more quickly, thereby accelerating the test cycles.
“Another trend is to process the test data at the ‘tactical edge’ using ML and AI techniques, providing real-time information to the test personnel at the ground mission control station or on-board the test platform.
“Edge processing solves some of the RF bandwidth limitations associated with telemetering large amounts of unprocessed ‘data,’” Kanamaluru says.
“Telemetering processed information helps to alleviate the workload for the ground and on-board test personnel. Edge processing also helps in determining if the specific test configuration and test point were successful, or whether another test run needs to be conducted immediately, thereby saving considerable costs and schedule,” he adds.
Looking ahead, Di Natale notes that the manufacturers of sensors and data acquisition devices are constantly looking for improvements in the measurement chain to increase data quality. This happens in terms of hardware improvements as well as advances in the interpretation of data.
Whereas, in the past, the recognition of poor data quality often relied on the experience of test and analysis engineers, Di Natale observes that ML and AI now provide the opportunity to quickly compare test results with historical data and identify anomalies and outliers from expected results, which can help improve the quality and speed of testing.
“Additionally, there are many benefits that can be realized with the greater automation of analytics and fewer manual steps in the data handling process,” Di Natale says.
“Another trend is the increased use of simulation and the need for correlation with physical test measurements to validate numerical models. Bringing all this together is the use of truly collaborative data and analysis sharing environments that can be used by both test engineers and simulation engineers alike.”


