Researchers at North Carolina State University in the USA have demonstrated a technique that allows them to track microscopic changes in metals or other materials in real time while they are exposed to extreme heat and loads for an extended period of time — a phenomenon known as creep.
The technique will expedite efforts to develop and characterize materials for use in extreme environments.
“Until now, you could look at a material’s structure before exposing it to heat or load, then apply heat and load until it broke, followed by a microstructural observation. That means you’d only know what it looked like before and after loading and heating,” says Afsaneh Rabiei, corresponding author of a paper on the work and a professor of mechanical and aerospace engineering at North Carolina State University.
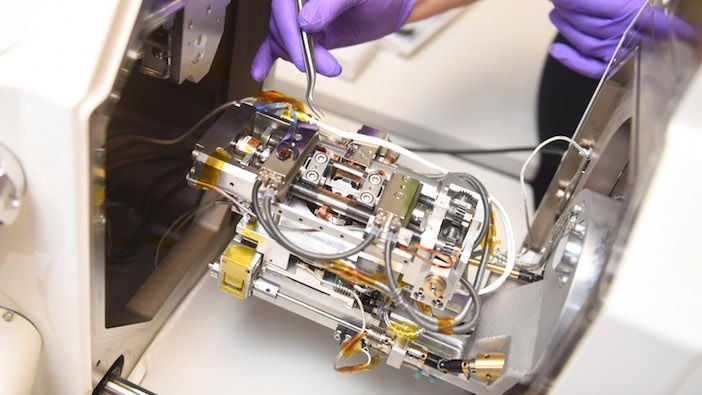
“Our technique, which is called in situ scanning electron microscopy heating and loading, allows us to see the microscopic changes taking place throughout the process. You can see how cracks form and grow, or how microstructure transforms during the failure process. This is extremely valuable for understanding a material’s characteristics and its behavior under different conditions of loading and heating.”
Rabiei developed the in situ scanning electron microscopy (SEM) technique for high temperatures and load (tension) as a means of conducting high throughput assessments of the behavior of advanced materials. The goal was to be able to predict how a material responds under a variety of heating and loading conditions.
The instrument developed can capture SEM images at temperatures as high as 1,000°C and at stresses as high as two gigapascal – which is equivalent to 290,075 pounds per square inch.
For their recent demonstration of the technique’s potential researchers conducted creep-fatigue testing on a stainless steel alloy called alloy 709.
“Creep-fatigue testing involves exposing materials to high heat and repeated, extended loads, which helps us understand how structures will perform when placed under loads in extreme environments,” Rabiei said. “That is clearly important for applications which are designed to operate for decades.”
“In situ SEM allowed us to track the microscopic development of cracks in the material and the evolution of the microstructure during the creep-fatigue testing,” Rabiei said. “We were then able to use these data to model what alloy 709’s behavior would be over years of use, for example in a nuclear reactor. And alloy 709 outperformed 316 stainless steel, which is what’s currently used in many reactors.
“That’s good news, but what is most exciting here is the methodology we used. For example, our in situ SEM technique allowed us to witness the role that micro-structural details called twin boundaries play in controlling crack growth in alloy 709.
“Our observations showed that when a crack reaches such twin boundaries in alloy 709, it redirects itself and takes a detour. This detouring effect delays crack growth, improving the material’s strength. Without our in situ SEM heating and loading technology, such observations could not be possible.
“Moreover, using this technique, we only need small specimens and can generate data that normally take years to generate. As such we are saving both time and the amount of material used to evaluate the material’s properties and analyze its failure process.
“The ability to capture insights like these is a significant advance for research into any number of new, high-performance materials, particularly those that are designed to perform in extreme environments,” Rabiei said.
The paper, “Performance of alloy 709 under creep-fatigue at various dwell times,” has been published in the journal Materials Science and Engineering: A.


