Additive manufacturing is continuously increasing in the aerospace industry during the past years. No other production technology allows the creation of such a diversity of structures and shapes with significantly less material resulting in less weight. And the reduction of waste is enormous.
Trends show that parts are steadily getting bigger and internal structures are getting smaller, much more complex. Detailed inspections in research, development and production are most critical.
Computed tomography is the non-destructive inspection technology of choice. So far, high energy and optimal spatial resolution did not work together. But the optimal solution is already at the door. A new 450 kV MesoFocus X-ray source is under development at Comet x-ray, and Yxlon had the chance to test the prototype in its inspection system YXLON FF85 CT – with impressive results. One of the test samples was an additive manufactured cooling pan made of copper, a very dense material with good thermal properties.
In use, water flows around inside the flat and inside the cone-shaped part. Therefore, it must be watertight, which can be difficult with 3D printing if the walls are too thin and something goes wrong during the printing process.
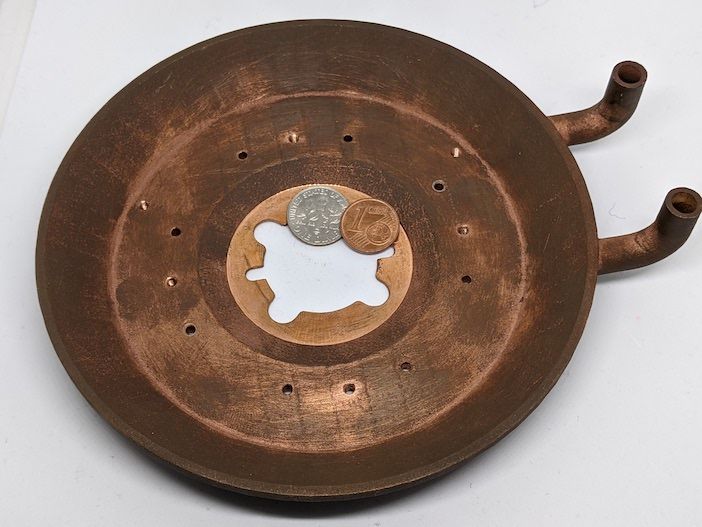
The most outer diameter of the copper part is 140 mm, and the top disk has a diameter of 100 mm. According to table 1 of the ISO 15708 2, when using 450 kV and a lot of filtering, 90% of the Bremsstrahlung gets absorbed by just 20 to 25 mm of solid copper. Between this and double thickness, CT with a flat-panel detector becomes problematic, and beam hardening artifacts, as well as noise, begin to dominate the images.
It is no exception here, as the radiation is blocked by 100 mm of copper when the disk plane is aligned to the beam. Using the highest possible acceleration voltage of 450 kV delivered by the MesoFocus tube turns out to be a great advantage. But as it is flat, the material thickness quickly decreases.
The scan parameters of a simple continuous 360° CT are 450 kV, 1.5 mm Sn filter and the 100 W, nominal 100 µm big focal spot, a focal detector distance of 900 mm, and a magnification of 3.6. Just one half of the sample was imaged by 1800 projections with 0.8 Hz.
For comparison, the part was also scanned with a 450 kV mini-focus tube, also at 450 kV and 2 mm Sn filter, 675 W.
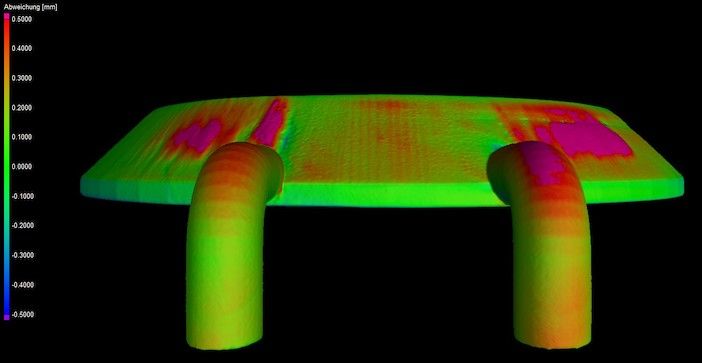
The lower resolution mini-focus result is sufficient to perform a nominal/actual comparison or variance analysis with the corresponding stl-file. The pink color shows that sections near the inlet and outlet are very far out of tolerance (Fig. 2). A cross-sectional look inside the part (Fig. 3) shows that a finishing machining of the material to the nominal dimension would open it.
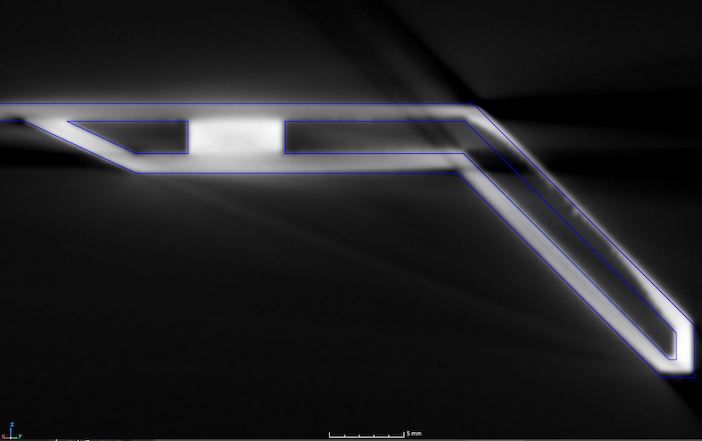
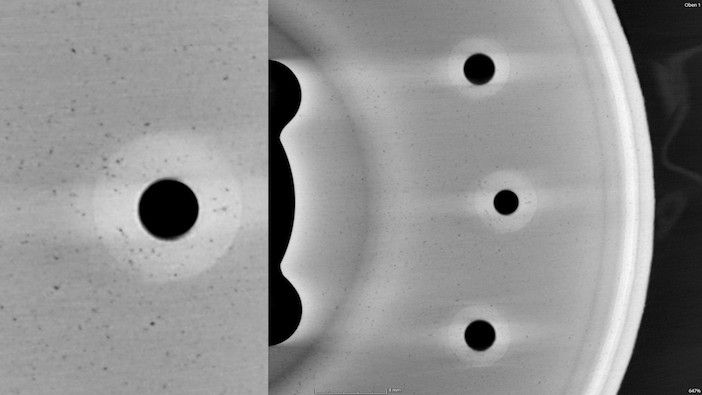
As for the water tightness, a construction of at least 1.2 mm thickness is recommended. When looking at Fig. 4 with a higher magnified crop on the left side, an even distribution of points with slightly different gray values is visible. Due to the resolution, the actual extent and the depth of these flaws cannot get determined.
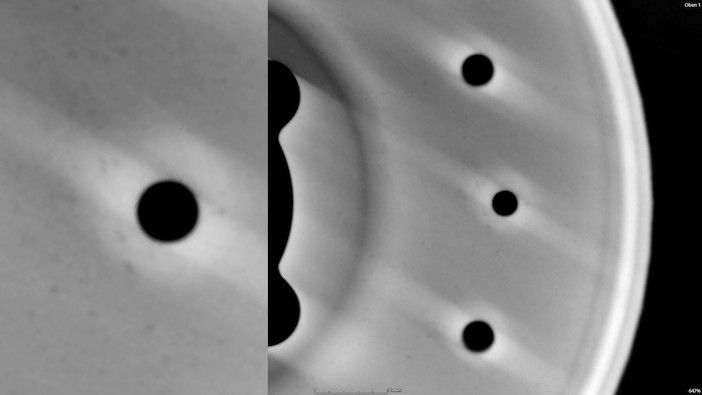
The high-resolution scan of the MesoFocus tube reveals much more details and enables a reliable evaluation and potential corrections of the manufacturing process.
