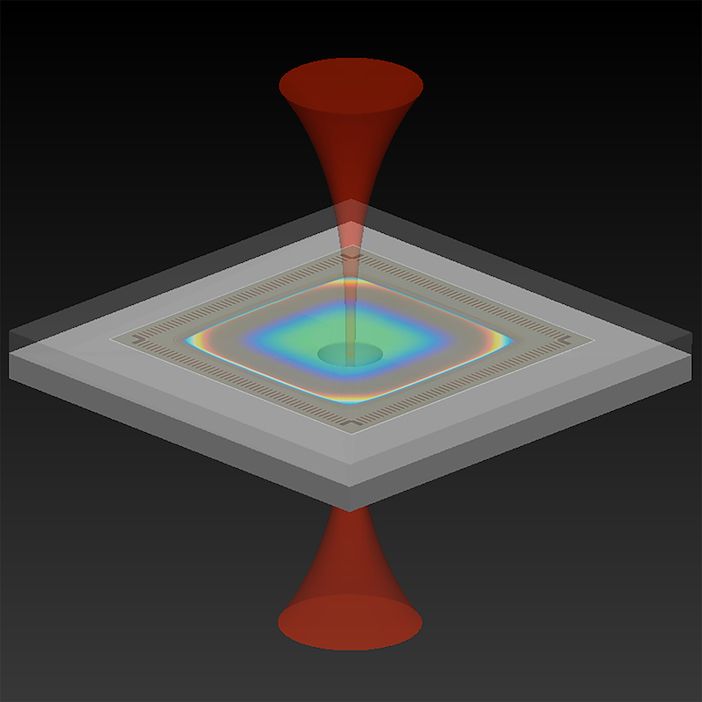
Researchers at the National Institute of Standards and Technology have developed an accelerometer one millimeter thick that uses laser light instead of mechanical strain to produce a signal.
Although a few other accelerometers also rely on light, the design of the optomechanical accelerometer makes the measuring process more straightforward, providing higher accuracy. It also operates over a greater range of frequencies and
According to the National Institute of Standards and Technology (NIST) the optomechanical accelerometer has been more rigorously tested than similar devices and is much more precise than the best commercial accelerometers. It also does not need to periodically calibrated.
The instrument’s use of laser light of a known frequency to measure acceleration could make it suitable for use as a portable reference standard to calibrate other accelerometers now on the market, making them more accurate.
The accelerometer also has the potential to improve inertial navigation in such critical systems as military aircraft, satellites and submarines, especially when a GPS signal is not available.
The animation below describes in more detail how the accelerometer works,
The accelerometer was developed as part of the NIST on a Chip, a program that aims to use the institute’s measurement-science technology and expertise for applications in commerce, medicine, defense and academia.
Accelerometers, including this new NIST accelerometer, record changes in velocity by tracking the position of a freely moving mass, dubbed the “proof mass,” relative to a fixed reference point inside the device. The motion of the proof mass creates a detectable signal.
The accelerometer developed by NIST researchers relies on infrared light to measure the change in distance between two highly reflective surfaces that bookend a small region of empty space. The proof mass, which is suspended by flexible beams one-fifth the width of a human hair so that it can move freely, supports one of the mirrored surfaces. The other reflecting surface, which serves as the accelerometer’s fixed reference point, consists of an immovable microfabricated concave mirror.
Together, the two reflecting surfaces and the empty space between them form a cavity in which infrared light of just the right wavelength can resonate, or bounce back and forth, between the mirrors, building in intensity. That wavelength is determined by the distance between the two mirrors, much as the pitch of a plucked guitar depends on the distance between the instrument’s fret and bridge. If the proof mass moves in response to acceleration, changing the separation between the mirrors, the resonant wavelength also changes.
To track the changes in the cavity’s resonant wavelength with high sensitivity, a stable single-frequency laser is locked to the cavity. The researchers have also employed an optical frequency comb — a device that can be used as a ruler to measure the wavelength of light — to measure the cavity length with high accuracy.
The markings of the ruler can be thought of as a series of lasers with equally spaced wavelengths. When the proof mass moves during a period of acceleration, either shortening or lengthening the cavity, the intensity of the reflected light changes as the wavelengths associated with the comb’s teeth move in and out of resonance with the cavity.
Accurately converting the displacement of the proof mass into an acceleration is a critical step that has been problematic in most existing optomechanical accelerometers. However, the team’s new design ensures that the dynamic relationship between the displacement of the proof mass and the acceleration is simple and easy to model. In short, the proof mass and supporting beams are designed so that they behave like a simple spring, or harmonic oscillator, that vibrates at a single frequency in the operating range of the accelerometer.
This simple dynamic response enabled the scientists to achieve low measurement uncertainty over a wide range of acceleration frequencies — 1 kilohertz to 20 kilohertz — without ever having to calibrate the device. Since the publication of their study in Optica, the researchers have made several improvements that should decrease their device’s uncertainty to nearly 1%.
Capable of sensing displacements of the proof mass that are less than one hundred-thousandth the diameter of a hydrogen atom, the optomechanical accelerometer detects accelerations as tiny as 32 billionths of a g, where g is the acceleration due to Earth’s gravity, a higher sensitivity than all accelerometers now on the market with similar size and bandwidth.
NIST researchers Jason Gorman, Thomas LeBrun, David Long and their colleagues describe their work in the journal Optica.


