by Norbert Ludwig, managing director at Aerotech GmbH
A sensor with a limited field of view can often be required to measure a surface which is much larger. This can be remedied by positioning systems which move either the sensor or the sample. The positioning and running accuracy of the movement system are crucial for the measurement results. Another fundamental pre-requisite is for the sensor feedback and positioning system feedback to be in precise synchronisation. Aerotech, manufacturer of high-performance motion control and positioning systems, offers a wide range of solutions for surface measurement technology applications – from the motion component level to motion subsystem platform, to turnkey machinery solutions.
Most optical sensors for measuring the surface properties of objects have only a limited field of view. When measuring the surface outside the field of view, either the sensor or the object must be moved or repositioned. It is important to distinguish between the position of the object being measured and the sensor movement, whereby the positioning itself should have as little influence as possible on the measurement result. The higher the sensor resolution and accuracy, the more precise the motion system has to be. In addition to precision, another important requirement in many applications is the degree of automation.
Precise positioning and monitored control
Surface analysis is often integrated directly into the production line as a quality assurance process. As is often the case in semiconductor manufacturing, for example wafer inspection or the production of flat panels, quality is assessed after almost every process step, necessitating fully automated in-process inspection with object loading, measurement and subsequent further processing. Control of the motion systems and synchronisation with sensors can generally be described as motion control, and this is exactly what Aerotech has been delivering for 50 years. As an experienced manufacturer, Aerotech offers customised solutions for automated surface measurement technology where high throughput and maximum accuracy are required. Among other things, users benefit from high-performance linear and rotary stages as well as controllers with hardware based real time position-synchronised triggering of sensors.
Mix of rotary and linear actuator
We will now examine in detail the surface measurement technology solutions Aerotech can provide – firstly, a positioning system which allows the combination of actuators to form a complete system.
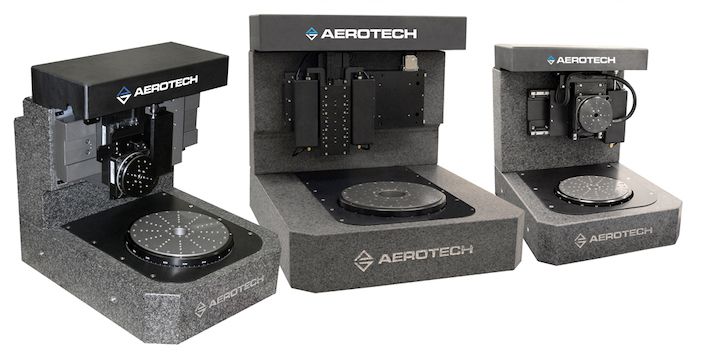
The surface measurement motion platform (SMP) is essentially a composition of various rotary and linear actuators – but in a very compact, space-saving design. The positioning system is particularly suitable for the optical measurement of spherical, aspherical and cylindrical surfaces.
The core component is an air-bearing precision rotary table on which the measurement object is attached using either a vacuum chuck or a clamping device. The sensor itself can be linearly adjusted in the Y and Z planes and can also be tilted with another axis of rotation so that it is always aligned perpendicular to the tangential plane of the target.
Various surface sensors can be integrated via the control software. The controller offers both digital and analog inputs for this. By selecting the actuators, surfaces can be measured down to the submicron range. This is particularly useful for the precise measurement of optical components in applications with mirrors or lens optics.
High-performance rotation axes for surface measurement in the nanometer range
The newly developed ABRX series comprises rotary tables with air-bearing rotary axes, available in three diameters of 100, 150 or 250 mm depending on the size of the object and the load capacity. The rotary table is operated directly and reaches rotational speeds of up to 300 rpm.
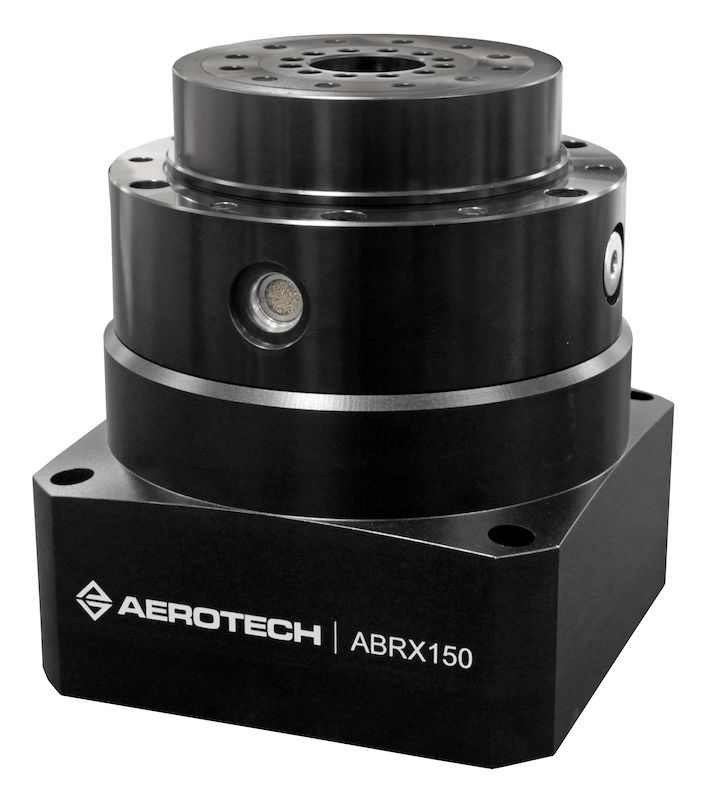
A special feature are the air-bearings for minimising radial and axial errors, all of which are in a range of less than 25nm. Errors can be divided into two types; synchronous and asynchronous types: The errors that occur periodically with the axis rotation are synchronous. At the factory, Aerotech has the capability of measuring the synchronous errors and then compensating for them either via moving a Z-axis in the axial direction or X-axis in the radial direction and correcting any measured values accordingly.
Asynchronous errors, on the other hand, are to be considered more as position noise and cannot be easily compensated for. By compensating for the synchronous errors, however, the radial and axial errors can be reduced well below 10 nm. The ABRX series is particularly suitable for surface measurements in the nanometer range and of course also as an extension to the SMP measuring platform.
Automation1 simplifies the control of positioning systems
Automation1 introduces a new development in the control technology area which, due to its complexity, required several years of development time. As a digital control platform, a whole range of optimisations are available to users in the measurement technology market, delivering an even higher optimisation potential relating to faster movement and settling times, enhanced position stability and increased contour accuracy.
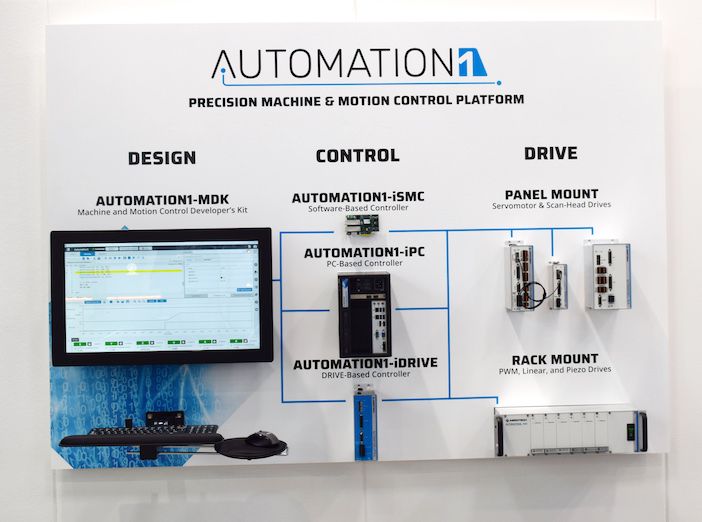
The improved setpoint generation rate is particularly helpful for surface measurement technology – the update rate of the position can be increased from 8 kHz to 20 kHz. This enables more rapid and accurate positioning of the sensor head or measurement object.
Faster I/O signals also guarantee almost instantaneous triggering of measuring cycles. With the so-called PSO (Position Synchronised Output), the measuring cycle can be started immediately the defined position is reached. Continuous measurement can also be initiated, whereby the measured values are synchronised with the position data. This results in considerable advantages compared with time-based triggering, since the accelerations or decelerations which otherwise occur can be neglected.
The enhanced signal-to-noise ratio of the amplifiers on the Automation1 platform (whether analog or digital) has significantly improved in-position stability. This results in lower position noise, which is particularly relevant for measuring tasks in the submicron range. In addition, the Hyperwire fibre-optic interface ensures very rapid signal transmission, even over long distances. As an optical signal, it is not susceptible to electromagnetic interference. As an added advantage, a new, intuitive user interface significantly simplifies human-machine interaction.
Integration of measuring systems using Keyence
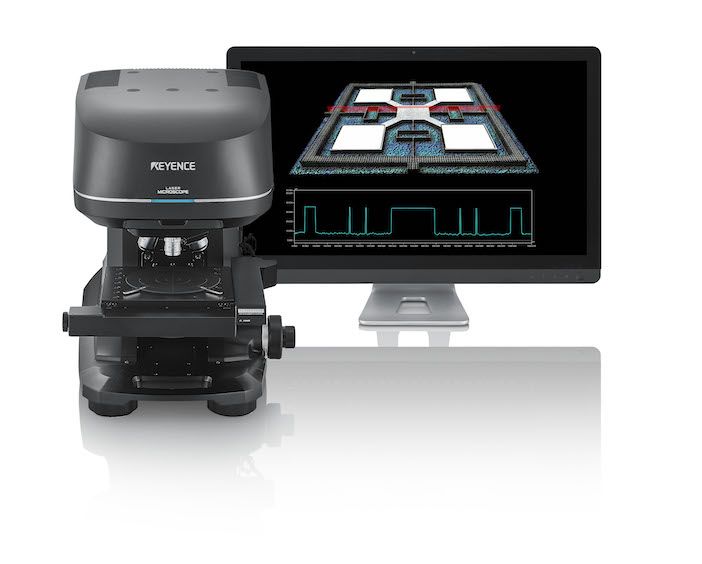
Aerotech has its own application team dedicated to the integration of measuring systems and positioning systems. An example is the integration of the current Keyence 3D profilometer. Surface measurement is achieved using a light section method (laser triangulation). In this way, contours, unevenness and roughness of components can be measured with a resolution of up to 1 µm.
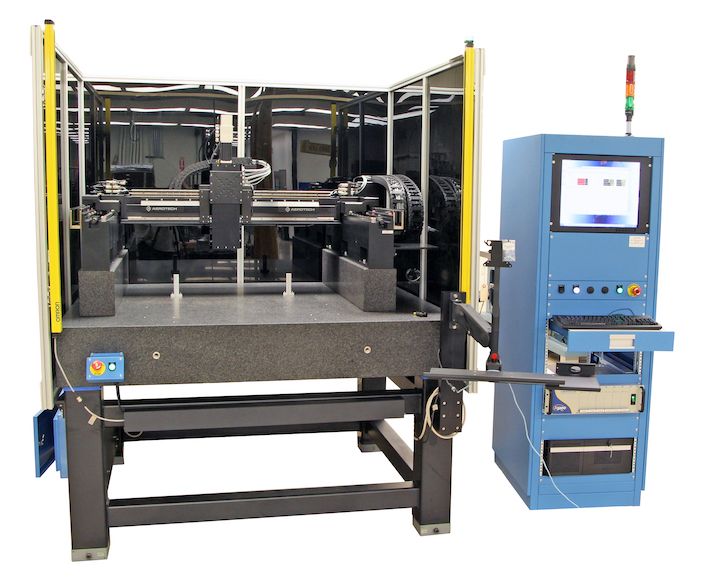
Keyence offers a compact table-top unit with a manual or optional stepper motor driven XY table. In the latest version, the measuring range has been increased to 200×100×50 mm, but this is still not sufficient for some applications, simply because of the load capacity of the table. Subsequently, both users and Keyence have asked to what extent Aerotech can offer a better solution – in the form of extended adjustment/travel paths, a larger Z-axis and a granite table base for a higher load capacity. The image below depicts this solution.
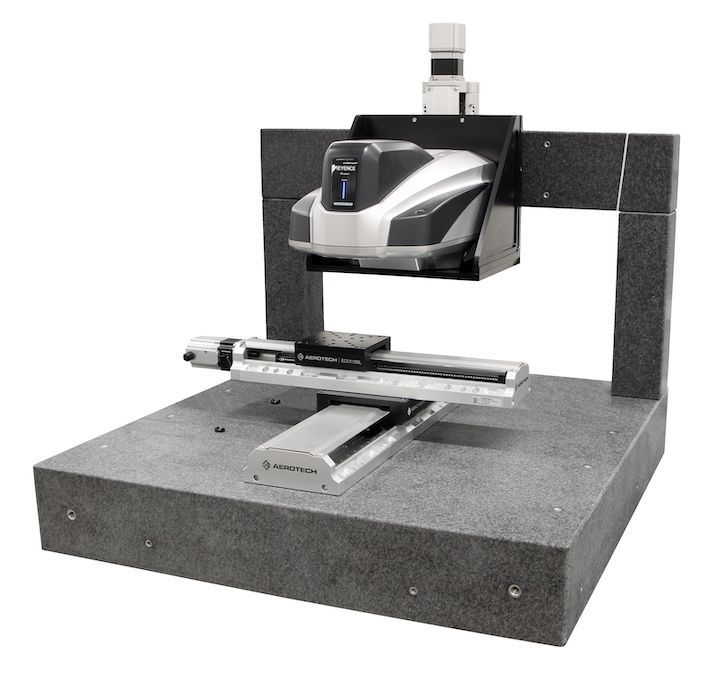
For this purpose, Aerotech’s experts have installed a Z-axis with an adjustment range of up to 300 mm on a stable granite base. The measuring head is supported by an adapter bracket. For component adjustment, a cross table is mounted on a granite base. The X and Y axes are controlled by a stepper motor controller, which is optionally available for the VR5000 3D profilometer. The height of the Z-axis can be adjusted either manually using a handwheel or using a joystick.
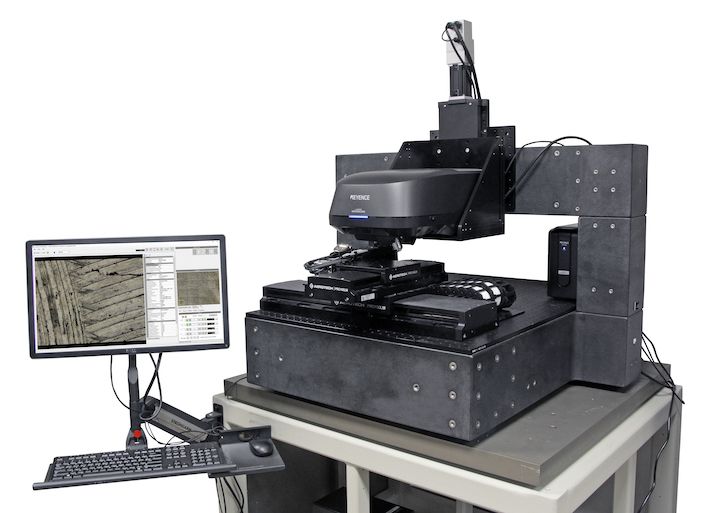
Even deeper integration has been achieved with the Keyence VK-X1000 3D laser scanning microscope. The laboratory system is also used for height profiling and roughness measurement. However, due to its higher resolution, it offers measurement capabilities in the submicron range, resulting in higher demands on the positioning system. Here, too, there were restrictions imposed by the manufacturer with regard to adjustment paths and load capacity which could be solved with Aerotech’s expertise.
With our laboratory systems, any combination of travel, loads and axis configurations can be realised. Collision protection can also be implemented using a Z-axis sensor. The overall image of the surface to be measured is displayed by Aerotech’s LMA (Laser Microscope Automation) software. Most other functions can also be controlled via the LMA screen, such as movement and positioning of the axes, the link to the Keyence viewer, a teaching procedure for measuring points and also a stitching procedure to subsequently combine the measurement results. In this way, LMA software can be used to fully automate measurement tasks across any component dimensions.
Such forms of integration can now also be realised for complete sets of testing equipment. In a recent customer-specific implementation, a laser line scanner was used as a sensor. The measurement data is recorded and compared with the CAD data using software. Special test dimensions can be visualised directly in the evaluation. The application shown here is already TÜV-approved and guarantees compliance with all machine directives as well as national and international safety requirements.
Aerotech does not intend to enter the market for measuring machines, but only integrates where a measurement technology manufacturer cannot offer a complete solution. In this regard, we are not limited to Keyence, but can also seamlessly integrate measuring systems from other manufacturers at any time.
 Norbert Ludwig has been managing director of Aerotech GmbH has been managing director of Aerotech GmbH in Fürth, Germany for the last three years. A graduate physicist, he has worked in the area of precision positioning for more than 30 years.
This article was supplied by Aerotech GmbH. For more information go here.
Find out more about Keyence here.
