Dame Xiangqian Jiang is a professor of precision metrology at the University of Huddersfield’s Centre for Precision Technologies in the UK. She is the director of the Engineering and Physical Sciences Research Council’s Future Metrology Hub and is the Renishaw / Royal Academy of Engineering Chair in Precision Metrology.
In this Q&A, she discusses the challenges faced by engineers in assuring the quality of additively manufactured (AM) parts for aerospace applications, revealing the solutions that are being developed to enable their use.
What role does metrology play in assuring the quality of AM aerospace components?
As AM has moved from producing prototypes to real production parts there is a need to build a metrology infrastructure for the parts produced by AM. The advantages of AM in efficiently manufacturing complex parts brings difficulties with associated metrology.
Most parts are conventionally finished to meet dimensional tolerance and can then be measured conventionally if part geometry is fairly simple. However, AM is able to produce parts with complex and hidden / internal features which are not accessible for conventional metrology techniques and is also not guaranteed to produce fully dense parts.
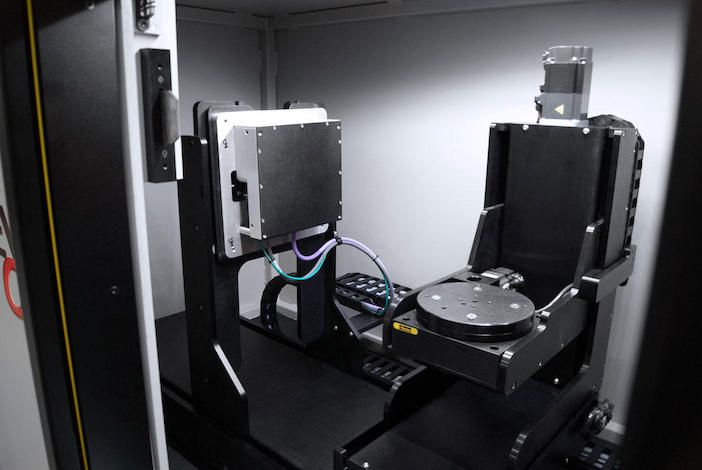
In response to this there is a need for non-destructive technologies (NDT) to analyse internal defects such as porosity. The emerging technology here is x-ray Computer Tomography (XCT). XCT can assess complex geometries (external and internal) and material defects simultaneously.
AM needs metrological methods for measuring, evaluating and validating both AM processes and AM parts, particularly in the case of fracture fatal applications such as aerospace. It also needs reliable metrological information for process control and part verification. This is highlighted by the UK’s national strategy: “the development of additional capabilities such as NDT and metrology should be a component of any UK AM development”.
What are the main issues around AM and what is being done to solve these problems?
AM is ideal for producing parts in light alloys and high temp Ni alloys. The main issues for AM for aerospace is guaranteeing defect free parts that will perform predictably over the lifetime of an aircraft.
The fatigue properties of parts are a particular concern. Detecting internal defects is difficult using conventional NDT technologies such as ultrasound. New metrology technologies based on XCT have the capability to bridge this gap. XCT for AM can detect defect size distribution and location and this can then be used to judge part functional performance.

Another major challenge is that AM processes are not robust enough and AM production machines lack sufficient process control. As a consequence, various shortcomings are commonly seen in AM products, including poor as-built surface finish, a lack of precision and repeatability, and mechanical properties not equivalent to those of bulk material
In addition the surface finish of an AM part is critical in many applications including aerospace, a surface roughness of 0.8µm or better is required to avoid premature failure from surface-initiated cracking.
In-process metrology is needed to secure robust process control and post-process metrology is needed to verify the quality of built components.
What are the challenges presented by AM parts from a quality inspection perspective?
Full exploitation of AM often results in part geometries that are optimized for function and are often of unconventional geometry. XCT as discussed, provided the basis for an effective metrology technology. There are however several challenges, such as:
- How to ensure the traceability of dimensional measurement to the metre
- Generating sufficient X-ray energy for large dense parts e.g. Ni alloys
- Formalising XCT analysis software so that different providers give comparable results on a given dataset
- The high cost of XCT systems
- The low speed of XCT systems
Where part metrology is concerned with part surface roughness there are limited systems available that can quantify the part roughness. These are optical and the focus variation principle appears most favoured.
The complexity of AM geometry and surface topography has caused many problems for existing measurement technologies. With highly complex geometry such as AM-lattice structures, conventional tactile and optical techniques are restricted to the line-of-sight constraint and for parts with a high surface roughness, re-entrant features, sharp local gradients, inconsistent optical properties.
How do they differ in their inspection needs from parts manufactured by more conventional means?
Generally, there is an assumption that parts made by subtractive manufacturing (machining) are largely free of internal defects. Such parts are dimensionally measured by conventional CMM or optical scanning technologies.
This assumption is not valid for AM and the nature of the layer wise build process has the potential to generate internal defects generically termed porosity. Internal defects can have a devasting effect on fatigue and strength properties. Consequently inspection techniques deployed need to take into account the possible complex or even freeform geometry as well as internal defects.
XCT is currently the only valid non-destructive method that can measure the complete internal and external geometry without the line-of-sight constraint. This unique feature makes XCT a great tool for the AM inspection. It can offer a 3 in 1 metrology solution: dimension, internal defects such as porosity and surface texture
What metrology methods and technologies are best suited to qualify AM aerospace parts?
AM offers much design freedom and can result in parts having free form geometries, internal channels, lattice structures and rough surfaces. Such features are very difficult or impossible to quantify conventionally.
Consequently, penetrating x-ray energy is the go-to principle for assessing part geometry. X-ray as a metrology technique is not yet mature but it is advancing rapidly, in terms of energy, resolution part size and measurement speed.
AM is challenging for all existing metrology methods, e.g. tactile suffers from mechanical filtering effect, optical has issues with inconsistent optical property and local sharp slope, XCT is limited by resolution and measurement uncertainty.
The selection of metrology technologies for AM aerospace parts depends on the requirements of a specific measurement task. There is no general solution for all the tasks.
We are therefore developing data fusion to take the advantage of different measurement techniques. This might be a future solution.
What new technologies or methods are you currently investigating at the Future Metrology Hub?
The Hub has been engaged in metrology research actively since 2014. Primarily this has been around several areas:
- Optimizing XCT for metrological analysis by understanding data acquisition, error sources, traceability and image reconstruction
- Using XCT to extract surface roughness data from internal and external part surfaces
- Developing novel optical metrology technologies for in-process/on machine monitoring of the AM process
- Developing optimised methods for assessing surface topography of AM surfaces
There is significant potential for in-process metrology for AM, in that the layer wise information generated has the potential for dynamic process control, particularly if combined with other measurement technologies such as local temperature during the build process. In fact, we have combined with a local company called Wayland Additive Ltd to pioneer such a system commercially.
How do you envisage future inspection of AM aerospace parts?
In-process metrology will enable robust close-loop control process, reducing the need for post-built metrology required for quality qualification.
Metrology will use AI (artificial intelligence) to tackle complex and difficult measurement tasks, system self-optimization, self-decision-making. Smart knowledge systems will give a priori knowledge to help and enhance AI systems, such as information about materials, manufacturing processes, build orientation, possible defects and geometry specification semantics.
“Industry 4.0” will also play a role in terms of sensor networks, edge computing, cloud manufacturing to share manufacturing and metrology data.
The Future Metrology Hub has a research team working on additive manufacturing (AM). Researchers in this area include Professor Liam Blunt, Centre for Precision Technologies and Dr Shan Lou (Member of ISO/ASTM Additive Manufacturing with a group of senior researcher fellows and PhD students.


